Ever wondered why the snack you love looks and tastes the same every time? It’s not magic - it’s a well‑ordered food processing sequence that turns raw ingredients into the final product. Below you’ll find the exact order most manufacturers follow, why each step matters, and practical tips to avoid common mistakes.
What is Food Processing?
Food Processing is a set of controlled operations that convert raw agricultural commodities into safe, shelf‑stable, and palatable foods. From farm to fork, the process adds value, extends shelf life, and ensures safety.
Why Follow a Fixed Sequence?
Changing the order can compromise safety, quality, and cost. For example, cooking before cleaning spreads contaminants, while skipping grading leads to inconsistent texture. The industry’s best‑practice sequence balances hygiene, efficiency, and product consistency.
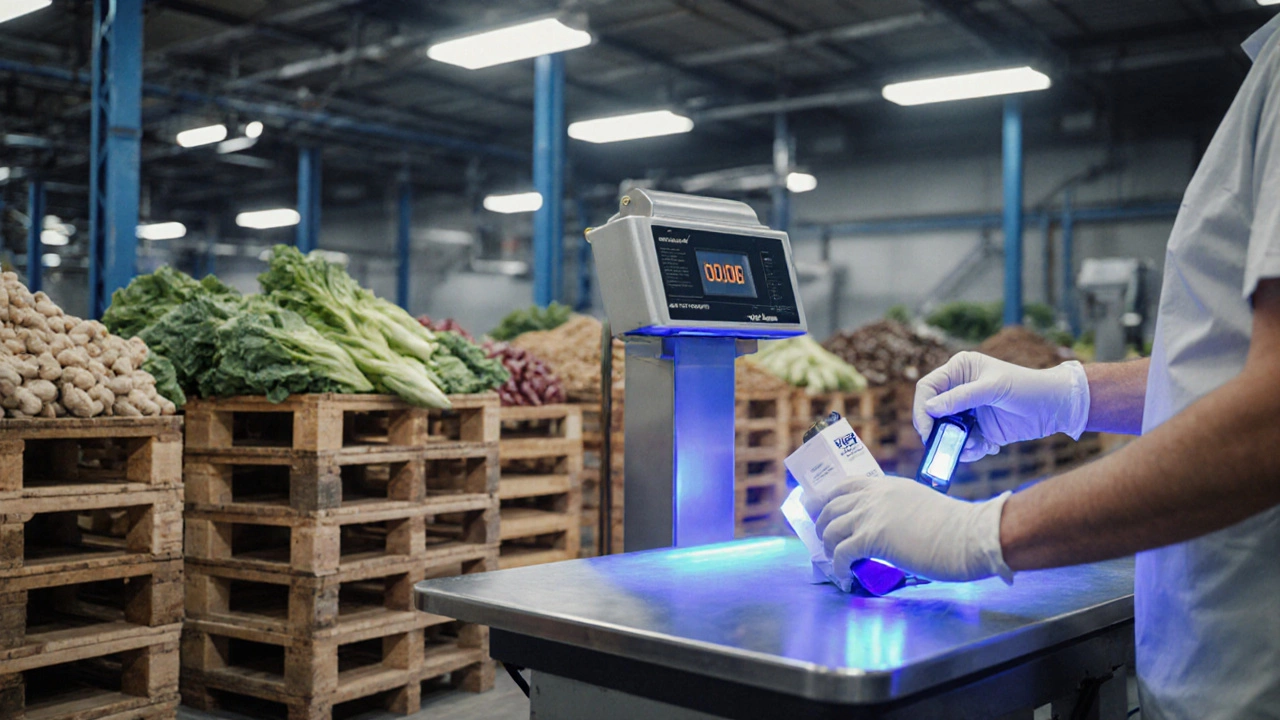
Step 1: Receiving & Inspection
The journey starts at the dock. Raw materials are weighed, sampled, and inspected for moisture, foreign matter, and pesticide residues. Quality teams use visual checks and rapid test kits. Any batch that fails the inspection is quarantined or returned to the supplier.
Step 2: Cleaning
Cleaning involves removing dirt, debris, and microbial load using water, brushes, and sometimes chemical agents. A typical line uses a three‑stage wash: pre‑rinse, detergent wash, and final rinse. For leafy greens, an anti‑caking agent may be added to prevent clumping.
Step 3: Sorting & Grading
Sorting separates usable produce from rejects, while Grading classifies items by size, color, and ripeness using optical sensors or manual tables. Proper grading ensures uniform cooking times and consistent texture in the final product.
Step 4: Cutting & Preparation
Cutting transforms whole items into the shapes required for the recipe - dice, slice, shred, or puree. Modern plants use high‑speed slicers with stainless steel knives that are sanitized between runs. For products like sausages, grinding and mixing are part of this stage.
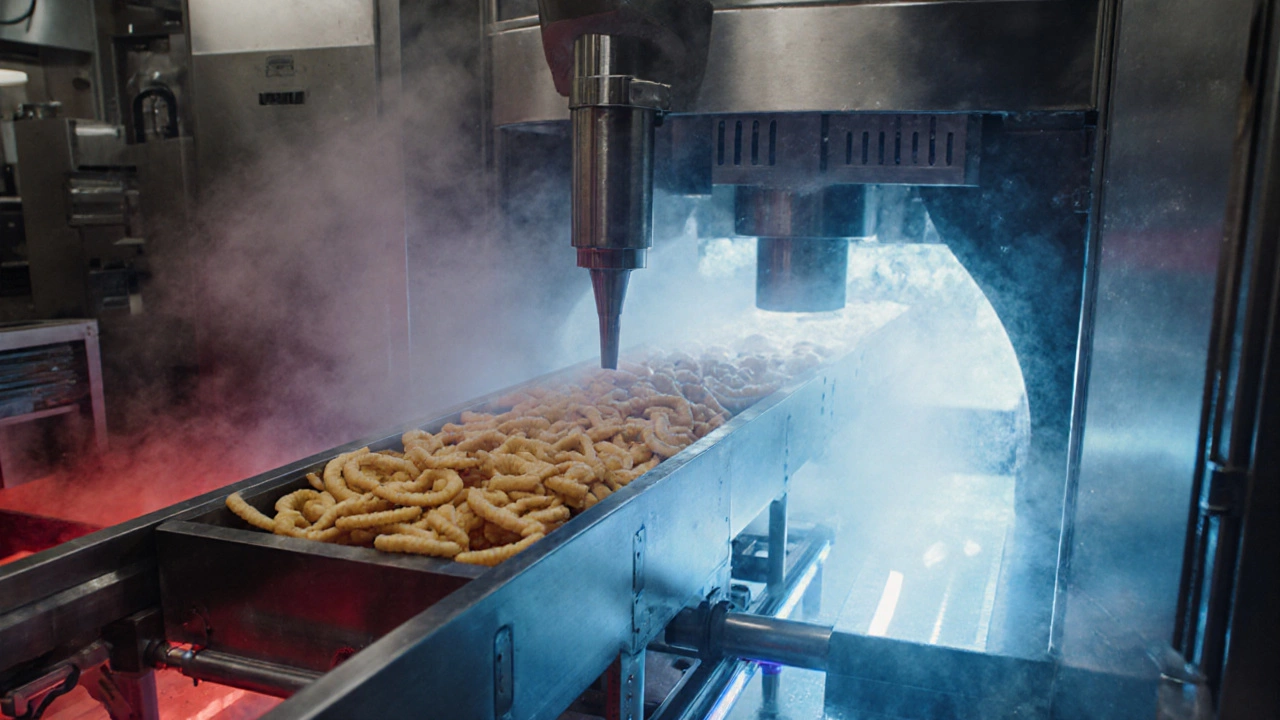
Step 5: Cooking / Heat Treatment
Cooking applies heat to kill pathogens, develop flavor, and achieve the desired texture. Methods include boiling, steaming, extrusion, baking, or frying. Precise temperature‑time profiles are crucial; a deviation of even 5 °C can affect microbial safety.
Step 6: Cooling, Freezing & Cold‑Chain Prep
After cooking, foods must be brought down to safe storage temperatures quickly to prevent bacterial growth. Cooling typically occurs via blast chillers that drop the product to < 4 °C within 90 minutes. For frozen goods, Freezing uses cryogenic or mechanical freezers that lock in moisture and texture.
Step 7: Packaging
Packaging protects the product, provides nutrition info, and extends shelf life. Choices range from vacuum‑sealed pouches for meat to retort cans for soups. Automated lines seal, label, and date‑code each unit, ensuring traceability.

Step 8: Storage & Distribution
Finished goods are stored in climate‑controlled warehouses until shipment. Inventory systems track batch numbers, expiry dates, and first‑expiring‑first‑out (FEFO) logic. During transport, refrigerated trucks maintain the cold chain, and GPS tracking offers real‑time visibility.
Common Pitfalls & How to Avoid Them
- Skipping cleaning. Leads to cross‑contamination and product recalls.
- Inconsistent grading. Causes uneven cooking and consumer complaints.
- Improper cooling rates. Allows bacterial spores to survive, shortening shelf life.
- Poor seal integrity. Results in moisture loss and oxidation.
Quick Checklist for a Smooth Process
- Verify supplier certificates at receiving.
- Run a three‑stage cleaning cycle.
- Calibrate sorting sensors before each shift.
- Inspect cutters for sharpness daily.
- Log cook‑time and core temperature for each batch.
- Confirm cooling drops below 4 °C within 90 minutes.
- Perform seal integrity test on 0.5 % of packaged units.
- Update warehouse inventory system with batch codes.
Mini‑FAQ
Why is cleaning the second step and not the first?
Cleaning after inspection removes visible debris and lowers the microbial load before any further handling. Skipping inspection first could let bad batches waste water and chemicals.
Can I combine sorting and grading?
Many modern lines use integrated optical systems that sort and grade simultaneously. However, the underlying principle remains the same: separate defects and classify quality.
What’s the safest cooling method for large batches?
Blast chilling with forced‑air circulation is the industry standard. It achieves rapid temperature drop while maintaining product shape.
How do I ensure packaging seals are airtight?
Perform a leak test on a random sample using a pressure decay tester. Any package that loses pressure beyond the set tolerance must be rejected.
Is it okay to store frozen products at -10 °C?
Most frozen foods require -18 °C or lower to maintain quality. At -10 °C, ice crystals can grow, leading to texture loss.
Following this exact order keeps your line efficient, your product safe, and your customers happy. Start mapping your own operations against this checklist and watch waste drop while consistency climbs.